background

Friday, October 18, 2013

New classes!

I know it's been a bit since my last post.  So sorry.  My house has been upside down with a variety of things this past 2 months.  Here's hoping everything levels out now!  On to my new classes....

It's a new quarter at Scrapp n' Savvy.  We had so much fun at the Sampler!  There were our favorites and some new faces in the crown too!  I have 6 classes this quarter and 2 are this coming week.  Here they are:

Autumn Harvest
This fun mini album (measuring a nice 6 x 9 size) will be this Monday.  We are using a special mini album design from Graphic 45's designer Laura Denison.  It is an adorable mini album that wonderfully showcases the lovely fall colors in Bazzill Paper's Autumn Harvest collection.  Very easy to make!  There is so much room in the album with all the tags.  Perfect to have ready to place those fall/halloween pictures of your family or just to give as a gift to someone special.  Each page is filled with embellishments.  No special supplies needed; just your normal stuff.

Absoutely Thrilling


This is probably one of my favorites this quarter!  Originally scheduled for last week, I had to reschedule it for this Tuesday due to some family health issues.  So, Tuesday it is!

This is a great piece of Halloween decor with a bit of a hidden surprise!  The front of the little wagon has an eerie Halloween scene perfect for the holiday.  Turn it around and the back drops down to reveal  a mini album!  The mini album holds so many 4 x 6 pics - perfect!!!  All the little details make this so much fun to look at.  We will be using Authentique's Thrilling collection.  It is just lovely.  Supplies needed: black and white distress paints, modge podge (or mat medium), orange highlighter, 3 in 1 glue, glue dots, and the rest of your reuglar class supplies.

Join me in either or both of these classes.  Just visit the link above to go to the store and sign up online.  If you cant make it but want a kit, just leave me a comment.

Have a great day.  Happy crafting!

Thursday, September 5, 2013

Ink Me!

There are so many inks available on the market today.  Pigment inks.  Solvent inks.  Distress inks.  So many to choose from.  Right?

Well, how do you know which is the right ink for your project?  This class will teach you that; and much more.  Ink me is designed to allow you to play with different types of ink and learn what each does, how to clean it up, and which is best used in different places.  We will make a small book that is perfect to keep in your scrapbooking bag.  Perfect for reference later on.


The supply list for the class is rather extensive.  There are some things that each person needs to bring with them.  Then there is the list of preferred items for you to bring.  These items are strongly recommended for each person to bring.  The class will be quite large and it will make things go very slow if we have to share just my things.  Please, please bring as many of these items as you have.  As always, there are products in the store that are on the list.  So, here is the list:

Mandatory (each person must have ):  tape runner, ink applicators, baby wipes (alcohol free), pencil, paper towels (about 10 should do unless you are really messy), hard surface to stamp on (the tables give and will not allow you to get a clean image.  Please bring a glass stamp board or a small cutting board or something hard to put under your paper to be stamped), and favorite small stamp (and stamp block if necessary. We are working on 2.5" square pieces so a stamp that size or smaller is great).

Everything on the following list will be used in the class.  Colors don't matter on this.  I have listed the colors I used in parenthesis so you know what is in my book.  Please bring as many of these as you have.  If you don't have it, then it will be available in the store or I will have my set to work with.  The more you have the faster it will go.

pigment ink like Brillance, Tsukineko, Versa-color, chalk inks (black or brown)
dye ink like Memento, Ranger Archival, or Stampin up classic
dye ink water based like Marvy, Tsukineko, Ranger Adirondack
india ink like PITT pens (this is optional)
solvent ink like Staz-On (black or brown)
White or clear embossing powder
heat gun
antistatic pouch (optional)
Versamark (to emboss with)
Distress ink pad, any color (I used walnut stain, broken china)
Distress stain, any color (I used walnut, broken china, peeled paint)
Distress paint, any color (I used tarnished brass, peeled paint, broken china)
Reinker, distress ink reinker , any color (I used walnut)
Distress stain picket fence
perfect pearl, any color
Alcohol ink, any color, and blending solution
Miny mister or misting bottle with water in it
small paintbrush to use with perfect pearls


I know this is a ton of stuff.  Many of you have this in your bags already but may not realize what inks you have.  This class is designed for you to learn how the different inks work.

I am excited about the class.  Should be fun!  See you Monday!


Wednesday, September 4, 2013

A brand new life

I love to re-do something old and make it look new again.  Don't you?  There is something very satisfying when I take something that might be headed for the trash and re-make it so it is functional.

Recently I found an old, horribly painted cabinet at my local thrift store.  I don't have a photo to publish because of the grafiti that was scribbled on it (totally inappropriate!).  So let me give you a mental image to work with:  The whole cabinet was painted dark forest green.  The doors had large pine trees and pine cones painted on them in various shades of green and yellow and brown.  The 3 drawers at the bottom each had a different outdoor type item painted on it (leaf, pinecone, and something unknown!)  and the knobs were yellow.  Then there was the overall general condition of the piece....very bad.  The bottom legs were splitting apart and the doors were falling off due to a missing hinge.  Trust me when I say it was bad.  Very, very bad.

But with some TLC and some fun paper and embellishments it became this:


I first tried to paint the cabinet with chalkboard paint.  It looked awesome.  Until I went to move it 2 days later.  Don't know what happened but the black rubbed off!  Most stayed on the cabinet but just too much came off.  So, re-do!  Sanded, painted it a soft blue, then finally white.  I distressed all the edges with sandpaper allowing the light blue to slightly show.  I then added a variety of papers (I think they were all Prima Marketing papers), some vintage lace, Graphic 45 pulls, Tim Holtz knobs, and some other fun embellishments.

So that piece of trash has now become a shabby chic wonder!

Have a wonderful day.

Monday, August 19, 2013

Faber Castell design audition - video

For those of you who know me or those who read this blog I think you will agree that I love Gelatos!.  They are made by Faber Castell Memory Craft and are just amazing.  I had the chance to visit CHA in January where I took several mixed media classes that featured some of the Faber Castell products, especially their mix n' match line.  Amazing.  I was hooked at the word go!

Recently I read that the wonderful peeps at Faber Castell were holding a designer team "audition" and I  just was so excited. I just simply have to try!   I have created a lovely mixed media canvas of a mermaid and I will show you how I made it!

Let me begin by showing you a photo of the finished canvas:
 We have a beachhouse and I began painting seahorses and mermaids to decorate some of the rooms in the house.  It has become a bit of an obsession.  I love to doodle them in black and white.  I have made them using only pastel pencils.  I have made many as gifts as well.  So it was easy to decide that I wanted to make this mermaid mixed media canvas for the audition.  She is made using all Faber Castell products along with some scrap paper and some other bits and pieces.  A supply list is at the very end of this post.

Are you ready?  It's time to show you how I made this lovely lady.

Do to size restrictions, the video has been split into 2 parts.
Click Here To View Video Part 1


That was just a quick tutorial.  I hope you enjoyed it.  I also used the PITT big brush pens, the smaller PITT pens, and PITT pastel pencils to highlight her tail and hair.  All were used on the mermaid pieces and on the canvas to add shadow around her.  I thought I would leave you with a few more pictures:


 This is a close-up of the mermaids tail and hair showing the beads, mini shells, and colors.  I absolutely love how her tail came out.  The colors are perfect.  Below is a page from my art journal showing some of my black and white doodles (using Pitt pens of course).  The mermaid in the lower right corner was my inspiration for this canvas.

I hope I inspired you to create someting wonderful.  If you have not tried the Gelatos or the PITT pens, I strongly recommend them.  I love creating with mine!

Supplies used:  Faber Castell - Gelatos in snow cone, cotton candy, blueberry, white, tangerine, mango, lemon, terra cotta, champagne gold, butterscotch, and silver ice; Big brush PITT pens - nougat and light cobalt turquoise;  PITT pens - orange glaze, dark chrome yellow, nougat, raw umber, and light cobalt turquoise; PITT pastell pencils - 1121-280, 1122-153, 1122-143, and 1122-156; gesso, Crafter's Workshop mask; glaze medium; Art Co. beads and micro beads

Friday, August 16, 2013

some fun

It's been a bit since my last post....sorry.  Life intervened!  We have had a wonderful summer and are back in school.  This means I have more time to post to my blog and play around with my scrapbooking and art!  Love that!

I thought I would post some pics of some of my summer art for you to look at.

These are some of my favorites.  I love to play with black and white and just doodle.  My daughter doodled a lovely feather and I decided to try my hand at it.  I really like how it turned out.  I bet there will be more of those feathers in my near future!  The bottom photo is a mixed media project that I made using all sorts of wonderful Faber Castell stuff.  You know how I love my gelattos!

Enjoy your day.  Stop by soon and see what craftiness I'm up to!

Friday, July 19, 2013

A little bohemian

I'm sure you have seen it by now and you might agree.  The new G45 Bohemian Bazaar paper collection is adorable!  So, let's have a class!

The class using the G45 paper and the Farmhouse mini album will be this Thursday the 25th.  Ladies, please bring your basic supplies and specifically tweezers, pencil, tiny attacher with staples, 1/8" scor or red tape, scorboard and tool, uhu stick or tape runner, 3 in 1 glue, scissors, paper trimmer, and any ink if you want to use it (I did not use any inks on this one).

 Front cover including the cute flower bead hanging on the rings.

 One of the inside pages
One of the pocket pages.

The paper is so fun and colorful.  Interested in joining us?  Just call Scrapp n' Savvy at 281-288-7289 and we can work you in!

For those of you who are Scrapp n' Savvy customers:  Our great surprise begins this Monday.  If you did not receive an email with all the juicy details, please take the time to call the store (number listed above) and we would be happy to give you all the wonderful details.

See you in class

Saturday, July 13, 2013

Time for some ice cream!

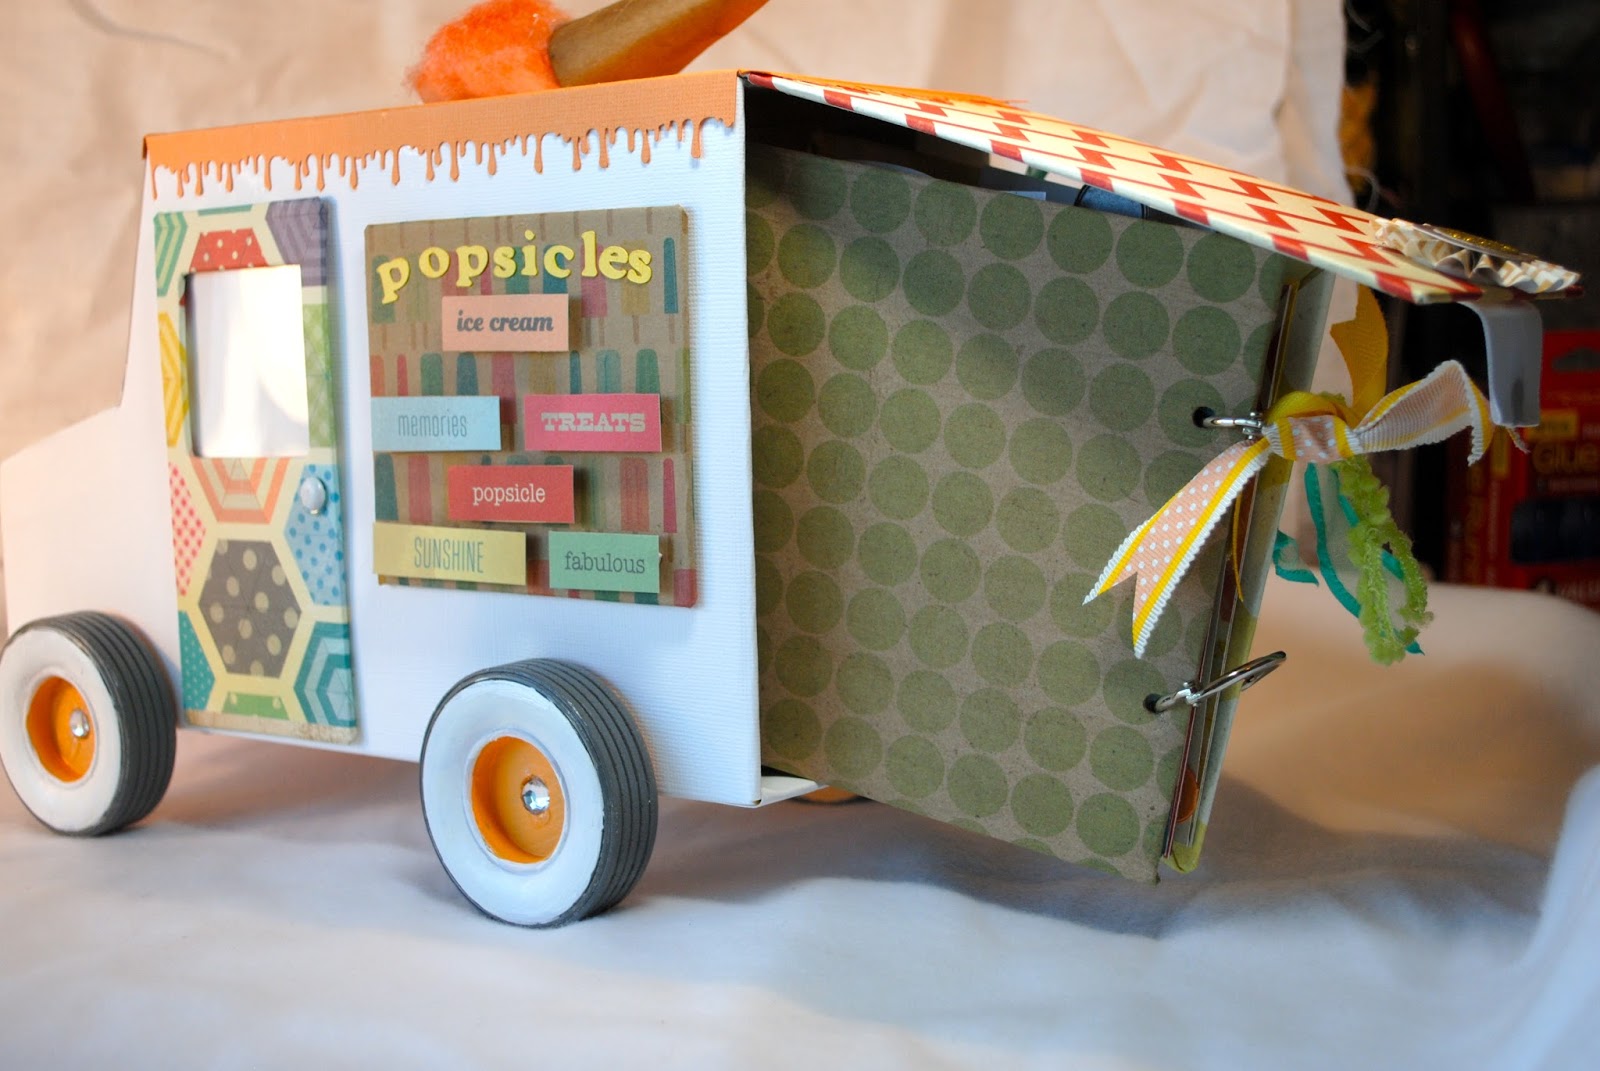
Summertime is the perfect time for ice cream!  Join me on Monday to create this adorable ice cream truck that has a hidden mini album inside.


I will be using The Pier paper collection by Crate Paper.  It has so many cute summertime prints.  In the last photo above you can see the mini album peeking out from the back door of the truck (sorry, I only got a photo of the back of the mini, bummer).  The mini is perfect for dropping your 4 x 6 summer pics in.

Class supply list:  Your adhesive arsenal (uhu stick, favorite liquid glue, scor or red line tape in 1/4"and optional 1/2"), pencil, ruler, scor board and scor tool, paper trimmer, and scissors.  For those who have signed up for the morning (daytime) class, lunch will be served.  There will also be a cool sumertime treat!

Hope to see you there.  Should be fun in the sun (well, I vote to stay inside with the air conditioning!!!).